")


Why TPM 2.0 is Important for Valorant on Windows 11
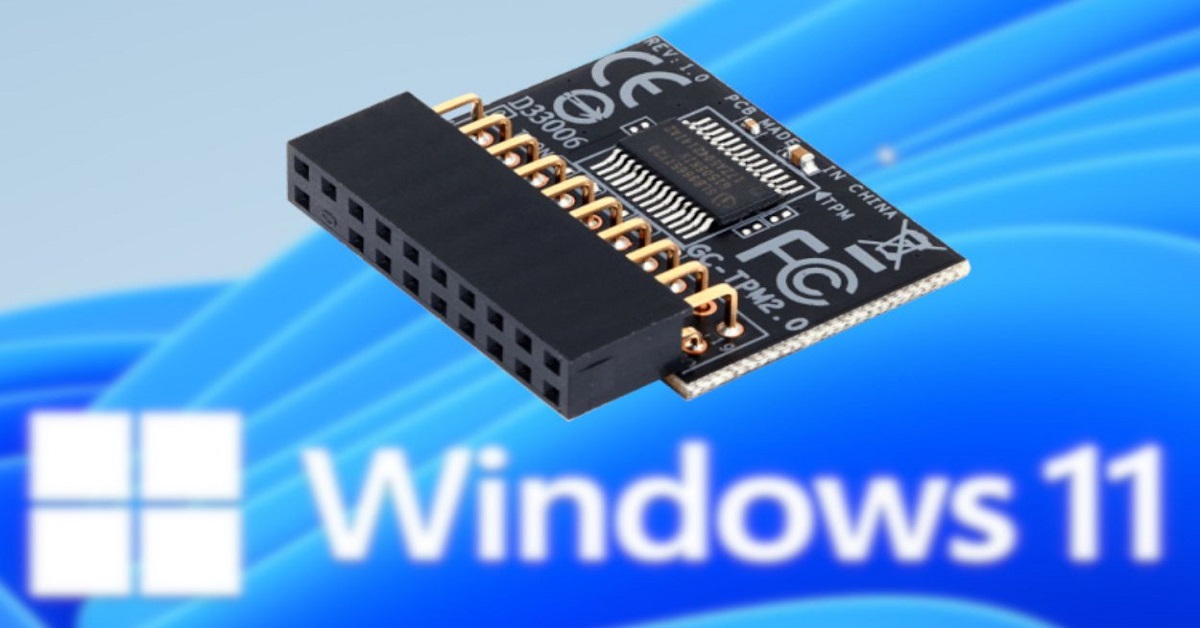
Valorant is arguably the most popular tactical first-person shooter, with its competitive matchmaking model, along with Riots Vanguard anti-cheat enforcement process, that delivers a robust cheat prevention system. Especially since Windows 11, Riot Games has mandated the use of both TPM 2.0 and Secure Boot when running the Valorant client. This requirement is more than just a technical check box; it is an integral part of securing player environments and fair environments for play.
TPM 2.0 (Trusted Platform Module) is a key part of invoking hardware-based security that is seeking to protect against system tampering or unauthorized access. With the focus on integrity and fairness in competitive play such as Valorant, TPM 2.0 is a way for the game, known for facilitating cheating and or commanders, to ensure the security of the players’ system prior to launch.
Product Description Table
| Attribute | Details |
| Game Title | Valorant |
| Category | Tactical Shooter / Competitive FPS |
| Developer | Riot Games |
| Publisher | Riot Games |
| Release Date | June 2, 2020 |
| Supported Platforms | Windows 10, Windows 11 |
| Official Link | https://playvalorant.com |
| Security Requirement | TPM 2.0 + Secure Boot (Windows 11 only) |
| Minimum RAM | 4 GB |
| Recommended GPU | GTX 1050 / RX 560 or higher |
| Optimization Focus | TPM 2.0 Security, Vanguard Anti-Cheat Compliance, Performance Enhancement |
| Total Downloads | Over 30 Million PC Users Globally |
How to Enable TPM 2.0 for Gaming
Step 1: Enter BIOS/UEFI Settings
To access your motherboard’s firmware interface:
- Restart your computer.
- During boot, press the BIOS access key (usually DEL, F2, or ESC) depending on your system’s manufacturer.
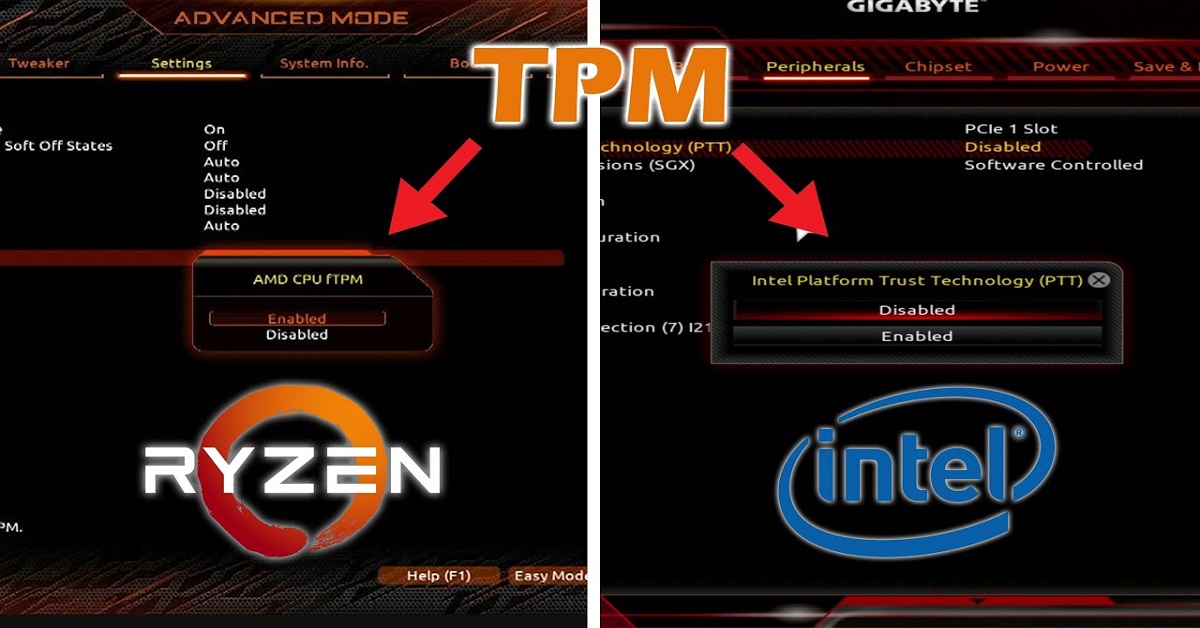
Step 2: Locate TPM Settings
- Navigate to Advanced, Security, or Trusted Computing tab.
- Intel Users: Look for PTT (Platform Trust Technology).
- AMD Users: Look for fTPM (Firmware TPM).
- Make sure the TPM option is enabled.
Step 3: Enable Secure Boot
- Go to the Boot tab and find Secure Boot.
- Switch it to Enabled.
- Some systems require setting the boot mode to UEFI to activate Secure Boot.
Step 4: Save and Exit
- Press F10 to save changes and reboot your system.
How to Check TPM 2.0 Status in Windows 11
- Press Windows + R.
- Type tpm.msc and press Enter.
- The Trusted Platform Module Management window will open:
- Status: “The TPM is ready for use.”
- Specification Version: Should read 2.0.
- Status: “The TPM is ready for use.”
If it shows “Compatible TPM cannot be found,” you may need to enable it in BIOS.
Valorant Security with TPM 2.0
Valorant uses Riot Vanguard, a kernel-level anti-cheat system that requires deep system trust to function effectively. TPM 2.0 helps:
- Validate the system at boot level.
- Prevent rootkits and low-level hacks from executing.
- Reduce potential vulnerabilities that cheaters might exploit.
By enforcing TPM 2.0, Riot ensures a cleaner, more secure ecosystem. If you ever get the error “This build of Vanguard requires TPM 2.0 and Secure Boot to be enabled,” the fix lies in your BIOS settings.
Improve Valorant Performance with TPM
Although TPM is mainly a security feature, enabling it helps improve stability and performance in games like Valorant. Here’s how:
- Prevents boot-time errors and game crashes linked to anti-cheat issues.
- Minimizes match delays due to background system integrity checks.
- Ensures smoother updates and consistent launches without freezing or lag.
Combined with Secure Boot, it creates a trusted environment, letting Riot’s Vanguard function with minimal interruption, enhancing your gameplay experience.
TPM 2.0 System Requirements for Valorant
Before diving into BIOS, make sure your PC supports TPM 2.0.
| Component | Minimum Requirements | Recommended for Valorant |
| OS | Windows 11 (64-bit) | Windows 11 with latest updates |
| TPM | TPM 2.0 | TPM 2.0 enabled in BIOS |
| CPU | Intel i3-4150 / Ryzen 3 1200 | Intel i5 / Ryzen 5 or higher |
| RAM | 4 GB | 8 GB or higher |
| GPU | Intel HD 4000 / Radeon R5 | GTX 1050 / RX 560 or better |
| Internet | Broadband | Wired Ethernet for lowest ping |
| Anti-Cheat | Riot Vanguard | Requires TPM 2.0 + Secure Boot |
Pro Tips to Maximize Valorant Performance
Once TPM is enabled, follow these extra tips for top-tier gameplay:
- Use Ethernet: For minimal ping and packet loss.
- Update Drivers: Keep GPU and chipset drivers updated (via NVIDIA/AMD software).
- High Performance Mode:
- Go to Control Panel > Power Options
- Select High Performance to get the most out of your CPU and GPU.
- Go to Control Panel > Power Options
- Close Background Apps: Use Task Manager to disable Chrome, Discord, or RAM-heavy apps.
- Game Mode ON:
- Settings > Gaming > Game Mode
- Enable it to focus system resources on gameplay.
- Settings > Gaming > Game Mode
Enable TPM 2.0 for Gaming – Extra Benefits Beyond Valorant
TPM isn’t just for Valorant—it offers security and usability improvements across Windows 11:
- Windows Hello: Enhanced biometric login support.
- BitLocker: Full-drive encryption to protect your files.
- Secure Boot: Blocks unauthorized drivers and startup programs.
- Future-Proofing: Required for many upcoming games and apps that rely on secure environments.
Version History Table
| Version | Date | Updates |
| 1.0 | May 2024 | Initial guide on TPM 2.0 for Valorant |
| 1.1 | August 2024 | Included BIOS setup, Secure Boot steps |
| 1.2 | October 2024 | Valorant performance tips and anti-cheat fixes |
| 1.3 | February 2025 | Ethernet and power mode optimizations added |
| 1.4 | April 2025 | Updated system requirements and TPM check steps |
Final Thoughts
If you’re serious about climbing ranks and avoiding frustrating errors in Valorant, enabling TPM 2.0 and Secure Boot is essential.It’s not just a requirement, it’s a level of hardware-based trust that adds to your system’s security, and your gameplay reliability.
No matter if you duel for fun or are a tactical competitor, these adjustments will help ensure you’re gaming in the most stable and secure environment possible. So open up your BIOS, adjust your settings, and let Riot’s Vanguard know-you’re ready!

 (498 x 142 px) (1)")